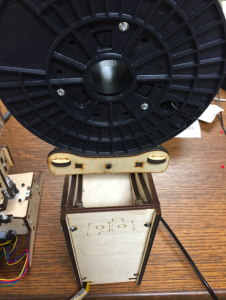
I realize that this pretty specialized, but I needed a way to connect two pieces of 5-ply 6mm birch plywood together in a perpendicular manner. Specifically, I have a Printrbot wood 3D printer and I needed a way to secure the stack of a wooden filament spool coaster/holder on top of my power tower (see pictures). Only one of the filament spools I have purchased over the last year fits into the filament coaster/holder built into the top of the power tower. So, I wanted to find a way to attach a different, adjustable wood spool coaster/holder on top of the power tower.
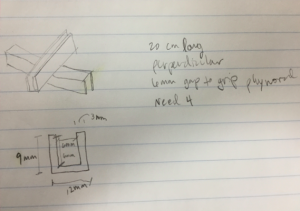
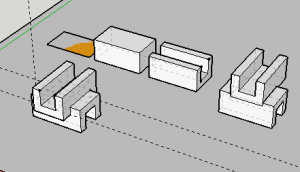
The concept behind my design is pretty straightforward and started with this drawing.
I just need two U channels set perpendicular to hold the plywood. The plywood measure about 5.8mm using my digital calipers and I believe from this measurement and from listening to an early Printrbot video that this is 5-ply 6mm birch plywood.
I planned to print my final parts using PLA, which does not flex as much as ABS, so I created the clips to be approximately .2mm greater than the actual thickness of the plywood. I designed the clips to use 3mm walls and a pocket 6mm deep for the plywood. I made the length of the clip 20mm as I thought it would be long enough to provide stability.
This piece requires support to print properly, so the support must be carefully removed after printing. In my case, I had to use an exacto knife and 220 grit sandpaper to remove all the support material, although it was quick and only took about 3 minutes per piece.
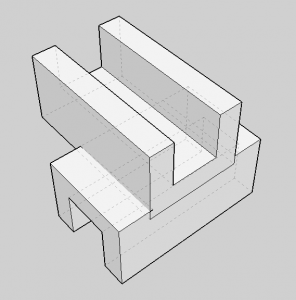
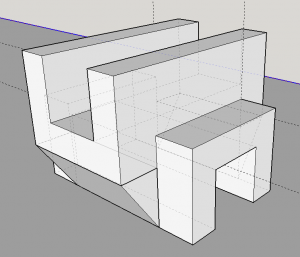
I started with a design in SketchUp that offset the two sides of the clip, but after printing, I decided a centered design would hold better as all the weight would sit squarely on the bottom of the bracket if it were centered. Here is the first design from SketchUp.
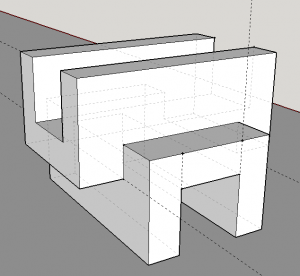
Then I moved on to a centered design, and prior to printing, noticed that support would be required to hold up the overhang and thought a more elegant design would include the support in the design. I was inspired by Clifford T Smyth’s book Functional Design for 3D Printing: Designing 3D printed things for everyday use – an engineering handbook to create better designs to make better 3D print models.
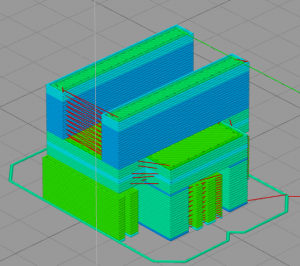
Here is the default support that was required for this centered design. The colors indicates the speed of the extrusion, but some of the green (green == fast) is support as indicated by the arrows. The green support on the lower left-hand side of the image below is specific support for the overhang.
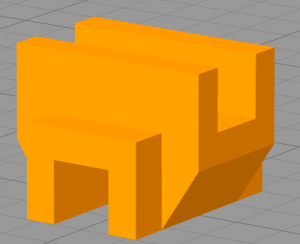
Below is the improved design (STL Download of final design) that eliminates some of the support required and, IMO, looks better with the support under the overhang.
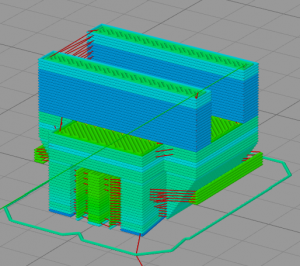
As you can see in the below image, the support for this new design is minimized, which is ideal and minimizes post print cleanup/finishing. The only support material is centered in the image below.
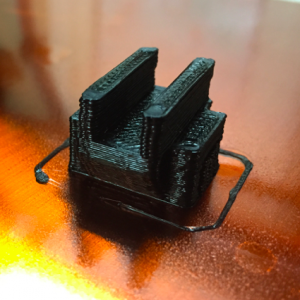
This is how the print looked on the print bed of the Printrbot.
In Marcus Ritland’s book 3D Printing with SketchUp, he recommends making copies of the model every time prior to make any large modifications, that way, you can always grab the model partially through its transformation to redo an operation or generally do something different. If you don’t keep a copy of the model along the way, sometimes it can be impossible (or seem that way) to adjust your model without starting over. Here is a screenshot that shows how I created copies and therefore managed my model throughout its evolution.
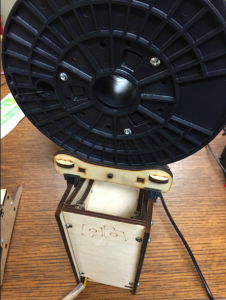
Below is a pictures of the stack of power tower and filament spool coaster/holder with the clips in place.
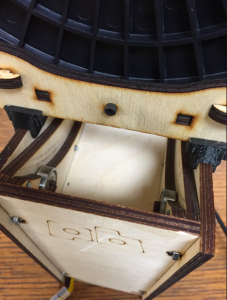
And a closer look at the black clips in place:
Leave a Reply